sábado, 5 de septiembre de 2015

Sancocho Tolimense


El auténtico y exquisito Sancocho Tolimense. Una receta de antaño con ingredientes frescos, simple en su preparación, muy completa y deliciosa! Servir con buen cilantro, cebolla, acompañar ají casero y aguacate.
Raciones: 6platos
Tiempo de preparación:15minutos
Tiempo de cocción: 80minutos
Tiempo de reposo:

Ingredientes
Instrucciones
  1. Ingredientes
  1. Lavar bien el cilantro y la cebolla, picar.
  1. Adicionalmente se hace un atado o ramillete con el cilantro y cebolla.
  1. Picar uno de los plátanos en trozos pequeños y el otro plátano rallado.
  1. Pelar las mazorcas y partirlas en tres pedazos cada una. Otra opción es usar choclo desgranado o una combinación de ambos.
  1. Poner el agua en una olla, agregar el atado, el cilantro, la cebolla picada y el ajo.
  1. Adicionar el pollo limpio y en lo posible sin grasa.
  1. Incorporar el plátano picado y el rallado.
  1. Dejar hervir por 20 minutos.
  2. Agregar los ingredientes restantes (papa, yuca, las mazorcas, caldo de pollo en polvo y sal al gusto).
  1. Dejar hervir por 50 minutos más o hasta que todo esté cocido y blando.
  1. Servir con más cilantro y cebolla y acompañado de arroz blanco, aguacate y ají casero.
Notas
Si usan choclo desgranado de grano grande y más duro (whole kernel corn) que viene congelado generalmente, deben ponerlo desde el principio de la preparación para que ablande bien.

De ésta receta salen 6 platos grandes de sopa.

miércoles, 10 de junio de 2015

Homemade 30 Minute Mozzarella Cheese Recipe – Bonus ricotta cheese

 by  45 Comments

Homemade 30 Minute mozzarella Cheese Recipe - Bonus ricotta cheese - Make homemade cheese more quickly and easily than you thought possible.
I recently decided to try my hand at home cheese making with friends, and it came out delicious!  I’ve been making yogurt cheese and kefir cheese, which simply require straining the yogurt of kefir, but this was my first “real” cheese.  I used the “30 Minutes Mozzarella Cheese” recipe from Ricki Carrol’s book “Home Cheese Making“.  Ricki also features this recipe on her website at www.cheesemaking.com.

Homemade 30 Minute Mozzarella Cheese Recipe

Ingredients
1 1/2 level teaspoons citric acid dissolved in 1/2 cup cool water
1 gallon pasteurized whole milk (raw milk from a safe source or even powdered milk may be used – see Ricki’s site for directions)
1/4 teaspoon liquid rennet (or 1/4 rennet tablet) diluted in 1/4 cup cool, unchlorinated water
1 teaspoon cheese salt (optional)
Directions
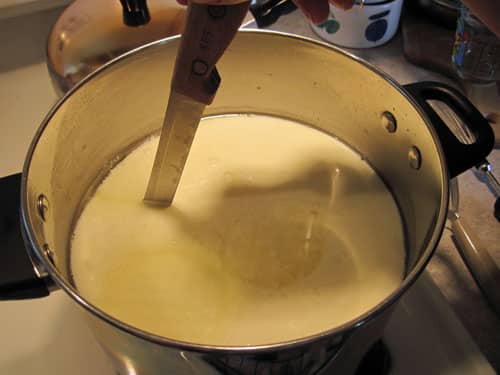
1.  Gently bring the milk up to 55 degrees F in a large, stainless steel pot.  While stirring, add the citric acid solution to the milk at 55 degrees F and mix thoroughly.
Note:  You may use skim milk, but the yield will be lower and the cheese will be drier.
Boys making mozzarella cheese @ Common Sense Homesteading
My youngest stirring the cheese. This recipe is so simple the boys usually tackle it on their own.
2.  Heat the milk to 90 degrees over medium-low heat, stirring constantly. Remove the pot from the heat and gently stir in the diluted rennet with an up-and-down motion for 30 seconds. Cover the pot and leave undisturbed for five minutes.
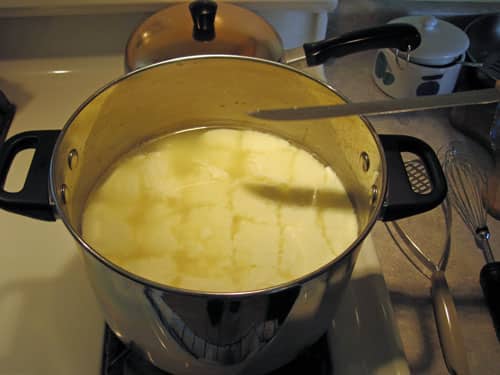
3.  Check the curd.  It should look like custard, with a clear separation between the curd and why.  (If the curd is too soft or the whey is too milky, let set for a few more minutes.)  Cut the curd with a knife that reaches all the way to the bottom of your pot.
cutting curd
4.  Place the pot back on the stove and heat the curds to 105F, gently moving the curds around with your spoon. (Note:  If you wish to make this cheese without a microwave, see directions below.)  Remove from heat and continue to stir slowly for 2 to 5 minutes.  (Stirring for 5 minutes will result in firmer cheese.)
sliced curd
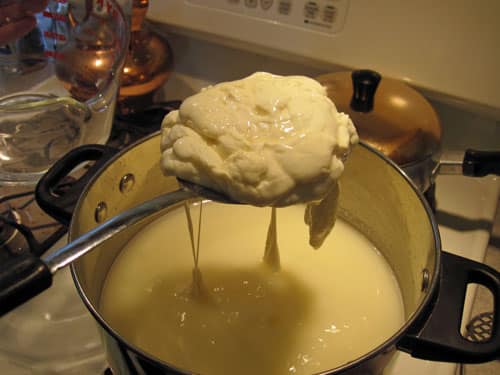
5.  Scoop out the curds with a slotted spoon and put into a 2 quart microwaveable bowl.  Press the curds gently with your hands, pouring off as much whey as possible.  Reserve the whey.  (You can use it to make ricotta cheese.)
Cheese-ready-to-pull
 
cheese-ready-to-pull-2
6.  Microwave the curds on high for 1 minute.  (***If you do not have a microwave, see directions below the string cheese photo.)  Drain off all excess whey.  Gently fold the cheese over an over (as in kneading bread) with your hands or a spoon.  This distributes the heat evenly throughout the cheese, which will not stretch until it is too hit to touch (145F inside the curd).  Rubber kitchen gloves are very handy at this stage.
7.  Microwave two more times for 35 seconds each; add salt to taste after the second time. After each heating, knead again to distribute the heat.
8. Knead quickly until it is smooth and elastic. When the cheese stretches like taffy, it’s done. If the curds break instead of stretch, they are too cool and need to be reheated.
Homemade 30 Minute Mozzarella Cheese Recipe - Bonus ricotta cheese
9. When the cheese is smooth and shiny, roll it into small balls and eat while warm. Or place them in a bowl of ice water for half an hour to bring the inside temperature down rapidly; this will produce a consistent smooth texture throughout the cheese. Although best eaten fresh, it can be stored in the refrigerator at this point.
Homemade 30 Minute mozzarella Cheese Recipe - Bonus ricotta cheese #30minutemozzarella #homemade #mozzarella
Note: If you are using store-bought milk, and your curds turn into the consistency of ricotta cheese and will not come together, switch brands of milk. It may have been heated at the factory at too high a temperature.
Yield:  3/4 to 1 pound from 1 gallon milk
Update:  After experimenting a bit more, I found you can also pull this into strips or strings (think “homemade string cheese”).  Pull the strips, drop them in the water to cool, then pack them tightly in a pyrex container or wrap in plastic wrap (I prefer pyrex).  They’re not as pretty as the store bought ones, but they work just the same.
homemade string cheese
homemade string cheese recipe
Although the original recipe recommended storing the cheese in water, I prefer storing it in a tightly sealed container without water. Water storage makes the cheese soft and washes out the salt.
***If you do not have a microwave:
After step 5, heat the reserved whey on the stove top to at least 175F.  Add 1/4 cup of cheese salt to the whey (you could probably substitute kosher salt, but cheese salt is best).  Shape the curd into one or more balls, put them in a ladle or strainer, and dip them into the hot whey for several seconds.  Knead the curd with spoons or gloved hands between each dip and repeat this process several times until the curd is smooth and pliable.  Please be careful!  This is really hot, and working with more liquid increase the risk of getting splashed!  If you use the non-microwave method, you cannot use the whey to make the Ricotta from Heaven below, because the whey will contain too much salt.
Optional Lipase Powder
If you want to add lipase powder to give the cheese more flavor, use 1/8 – 1/4 teaspoon, dissolved in 1/4 cup cool water and allowed to sit for 20 minutes. To start, probably try the mild and see how you like the flavor. Add the lipase and water mixture at the same time you add the citric acid solution. If you add lipase to this cheese, you may have to use a bit more rennet, as lipase makes the cheese softer.

Ricotta From Heaven

(also from Home Cheese Making)

Ingredients
Fresh whey, no more than 3 hours old, left over from making hard cheese
Directions (other options available at www.cheesemaking .com)
1.  Heat the whey in a pot until foam appears,  This usually happens just prior to boiling; if the mixture boils, it will taste burned.
2.  Turn off the heat; let the whey set for 5 minutes.
3.  Gently skim off the foam and place the whey in a colander lined with butter muslin.
4.  Let drain for 15 minutes, then refrigerate.  This ricotta will keep for up to one week in the refrigerator.
Yield:  About 1/2 pound per gallon of whey
*Note – I later read that the 30 minute mozzarella whey is not recommended for making ricotta (it says this in the cheesemaking kits), but mine works just fine.  I’m glad I didn’t read that I wasn’t supposed to do it before I did it.
We ate one batch of mozzarella fresh, and then I made more to put on homemade pepperoni pizza.  :-)  It was delicious.
homemade-pizza
The ricotta was lovely, too.  Very smooth and creamy, and just a tiny bit sweet.  I think it would be great in homemade lasagna.  The leftover whey can be used for fermenting vegetables, such as beet kvass, or you can chill it and add some flavored drink mix for a nourishing beverage.  My kitties like to drink it plain.  I warm it up for them on cold mornings.
I’m looking forward to trying other cheese recipes, but these were great ones to start with – very quick and easy.
Another family favorite that may be even easier, although it takes a bit longer, is fromage blanc.  Fromage blanc is a soft white cheese that is great as a spread or dip.  (Or for topping spuds – yum!)  It can also be used in cooking.The recipe only has five steps – that’s it!  Learn how to make fromage blanc in this post.

How to Make Organic Butter

Ingredients

  • 2 cups organic heavy cream
  • sea salt, to taste
  • Method
  • Pour cream into food processor and process for about 10 minutes.  It will turn to a thick whipped cream first.
  • Continue processing until it turns  grainy and separate into butter and butter milk.  Drain buttermilk from butter.
  • Scrape butter from the sides.  Put in a clean bowl.  Place your butter into a colander and strain off the buttermilk.
  • Rinse the butter with cold water, gently turning the butter with a spoon while the cold water runs over it until the water runs clear.
  • When the butter is clean, squeeze more  liquid from butter using wooden paddles or spoons to smash butter and pour off liquid.
  • You can keep it in a jar or bowl, and store it in the fridge, or the freezer. This type of butter can last for several months before going bad.
You can also make amazing compound butters which kids love. According to MotherEarthLiving.comthese are some fun combos to try with softened, unsalted butter:

sábado, 25 de abril de 2015

Permaculture:4 Ways to Preserve Fruits and Vegetables


A permaculture design seeks to maximize the yield of food that grows in it. By promoting biodiversity, succession planting, 
 stacking systems and the efficiency of use of space, a permaculture plot

should be able, space permitting, provide a large proportion of the gardener’s required fruit, vegetables and herbs. And by treating the plants and soil with respect, making sure that there is a lot of organic matter in the soil so that plants can attain all the nutrients they need, the gardener should cultivate strong, healthy plants that give a large edible harvest.

One of the most appealing things about growing your own food is that you can go from earth to table in the minimum amount of time, ensuring your fruits and vegetables are at their freshest and most nutritious. But sometimes your productive plot will produce more harvest than you can eat fresh.
This abundance is not simply to be left to wither on the branch or rot on the ground. There are several options that the permaculturist can employ to utilize the extra food.
It could provide an opportunity to exchange with other local food growers. Often, particularly in urban areas where plots are typically smaller, neighbors will grow different types of vegetables and fruits. Swapping allows each to make use of their abundant crops and increase the range of their diet. A good harvest could also give the gardener a means to earn income, selling at farmer’s markets, for example.
However, another option, which involves keeping the produce onsite, is to preserve the fruit and vegetables that you do not eat at the time of harvest. This allows you not only to have those foodstuffs available even when they are not in season; it allows you to experiment with different ways of treating and eating your produce. Here are the primary ways of preserving fruit and vegetables.
Canning
Canning involves placing fruit and vegetables in airtight containers, typically glass jars, and so prevent bacteria getting to them. Canned good can be stored on shelves for years, if required. There are two methods, although one requires a specialist machine so may not be practical or cost-efficient for many people. This is the pressure canning method, which enables you to achieve temperatures above boiling point that foods with low acidity require to effectively neutralise the threat of the botulism bacteria remaining active. It requires a pressure canning machine and is the method used to can most vegetables, as they are low in acid. Fruit, being high in acid, does not have the threat of botulism, so can be canned using a simpler method. Just place your fruit in the jar, top with boiling water, leaving an inch or so of space at the top of the jar (to allow space for the fruit to expand), run a spatula around the inside edge to remove any air bubbles, then close with a threaded lid.
Whichever method you use, the jars must be sterilized before being filled. You can do this either by using sterilizing tablets such as those used for babies’ bottles, or by placing the jars (and their lids) in an oven on a low temperature for half and hour or so in order to kill all the bacteria.
Salting
One of the oldest methods of preserving food, salting can be used for meat and fish, as well as sliced vegetables. There are two methods. The first uses a low salt to vegetable ratio (between two and five percent salt per weight of vegetables). This level of salting promotes the growth of the lactic acid bacteria, which in turn inhibits the growth of other bacterial forms that could spoil the food. It also serves to slightly pickle the vegetables. The second method uses a higher percentage of salt (between twenty and twenty-five percent), preserving the freshness of the produce but adding a salty flavour when used, even after the salt has been washed off. Whichever method of salting you use, you need to store the produce in the refrigerator.
Drying
Drying dehydrates the fruit or vegetables, removing all the water along with the bacteria, yeasts and mold that live in the moisture. Besides altering the texture of the food, drying also modifies the taste, typically concentrating it. Dried food has the added benefit of being safe to store as is on your pantry shelf – you don’t need special packaging to keep it in or to keep it in the refrigerator. In some countries solar drying of food is a part of life, and if you live in an area that receives high levels of consistent sunshine, you may be able to dry food that way. More likely however, is drying in an oven. The technique requires low temperature and good air circulation so use the lowest setting and prop the oven door open – this allows the air that the moisture has evaporated into to escape.
Freezing
Freezing fruit and vegetables soon after they are picked serves to ‘lock in’ the flavour and freshness of the produce. Freezing and then ways to preserve fruitthawing a vegetable or fruit is the preserving method that will have an end product that most closely resembles the taste of fresh food. You effectively place the food in suspended animation in whatever condition it is in when you freeze it, so always freeze ripe produce, and avoid spoiled specimens. You can freeze the produce in wax-coated cardboard containers, in plastic boxes or jars made with very thick glass. It is recommended that you blanch vegetables you are going to freeze in boiling water for a minute or so beforehand – this limits the activity of enzymes that may spoil the produce if stored over a long time. You need a temperature below freezing point for effective long-term storage, so use the freezer compartment in your refrigerator for food that you will use within a month, as temperatures in these rarely get down to the requisite zero degrees. When thawing food, leave at room temperature until completely thawed, rather than trying to thaw in the oven.